How to combine multiple photos into one PDF (iPhone, Android, Windows, Mac)
PDF tools · Published
Several ways to turn a set of photos into a single PDF on any phone or computer, with the built-in options and a browser tool.
Every current phone and computer can already turn a handful of photos into one PDF without extra apps. On an iPhone, the Files app has a Create PDF action. On a Mac, Finder does the same with a Quick Action. On Windows and most Android phones, you "print" the photos to a PDF instead of to paper.
Those built-in routes work well for a quick job, but they give you little control over page size, margins or page order. If you want a tidy document, such as receipts for an expense claim or scanned homework, a browser tool like Filecon's JPG to PDF lets you set those before you save.
On an iPhone
Files app: Create PDF
This is the cleanest built-in option. It needs the photos to be in the Files app first.
- In Photos, select the photos, tap Share, then Save to Files. Pick a folder, ideally a new one so nothing else gets mixed in.
- Open the Files app and go to that folder. Tap the More button (the three dots), then Select.
- Tap each photo you want in the PDF.
- Tap More at the bottom of the screen, then Create PDF. The new PDF appears in the same folder.
The page order follows the order of the files in the folder, so sort the folder by name first if order matters. Each page takes the shape of its photo, so a mix of portrait and landscape shots gives you pages of different sizes.
Photos app: Print to PDF
- In Photos, select the photos in the order you want them, tap Share, then Print.
- Depending on your iOS version, the print screen may offer a way to save the result directly. If it doesn't, spread two fingers apart on the page preview to open it as a full PDF.
- Tap Share and choose Save to Files or send it straight from there.
The print route fits photos onto paper-sized pages, which can leave white borders. Menu names on the print screen have changed between iOS versions, so if your screen looks different, look for a share or save button near the preview.
On an Android phone
Android has a built-in Save as PDF printer. How you reach it depends on your phone brand and gallery app, so treat these steps as a general route.
- Open your gallery app (Google Photos or your phone's own Gallery).
- Select the photos, then look for Print in the Share menu or under the More (three dots) menu.
- At the top of the print screen, change the printer to Save as PDF. Tap the small down arrow if you want to change the paper size or orientation.
- Tap the PDF or download button, choose where to save, and confirm.
On Windows 10 or 11
Windows includes a virtual printer called Microsoft Print to PDF. You can send several photos to it at once from File Explorer.
- Put the photos in one folder and rename them if needed so they sort in the order you want (for example, 01, 02, 03).
- Select them all, then right-click. On Windows 11, choose Show more options › Print. On Windows 10, choose Print.
- In the Print Pictures window, set the printer to Microsoft Print to PDF and pick a layout such as Full page photo.
- If you see a Fit picture to frame checkbox, clear it to avoid the edges of your photos being cropped.
- Click Print, name the PDF and choose where to save it.
The Photos app can also print a single photo to Microsoft Print to PDF (press Ctrl+P), but File Explorer is simpler for a batch.
On a Mac
Finder: Create PDF
- In Finder, click the photos in the order you want them to appear in the PDF.
- Control-click the selection and choose Quick Actions › Create PDF.
- The PDF appears next to the photos, named after the first photo you selected.
Apple notes that the pages follow the order in which you selected the files, so click them one by one with Command held down rather than dragging a box over them.
Preview: more control over order
- Select the photos in Finder, Control-click and choose Open With › Preview. They open together in one window.
- If the sidebar isn't visible, choose View › Thumbnails. Drag the thumbnails into the order you want.
- Click a thumbnail and press Command+A to select all of them.
- Choose File › Print, then open the PDF menu at the bottom of the dialog and choose Save as PDF.
File › Export as PDF in Preview works on the image you're viewing, so use the Print route when you want several photos in one file.
With Filecon in any browser
Filecon builds the PDF in your browser on your phone or computer. Your photos are processed on your device and aren't uploaded. It works the same way on every device, which helps when the built-in options above don't give you the layout you need.
- Open JPG to PDF and choose your photos, or drop them on the page.
- Put them in order by dragging the handle on the left of each file or using the up and down arrows.
- Choose a page size (US Letter, A4 or Fit to image), an orientation and a margin. The page preview updates as you go.
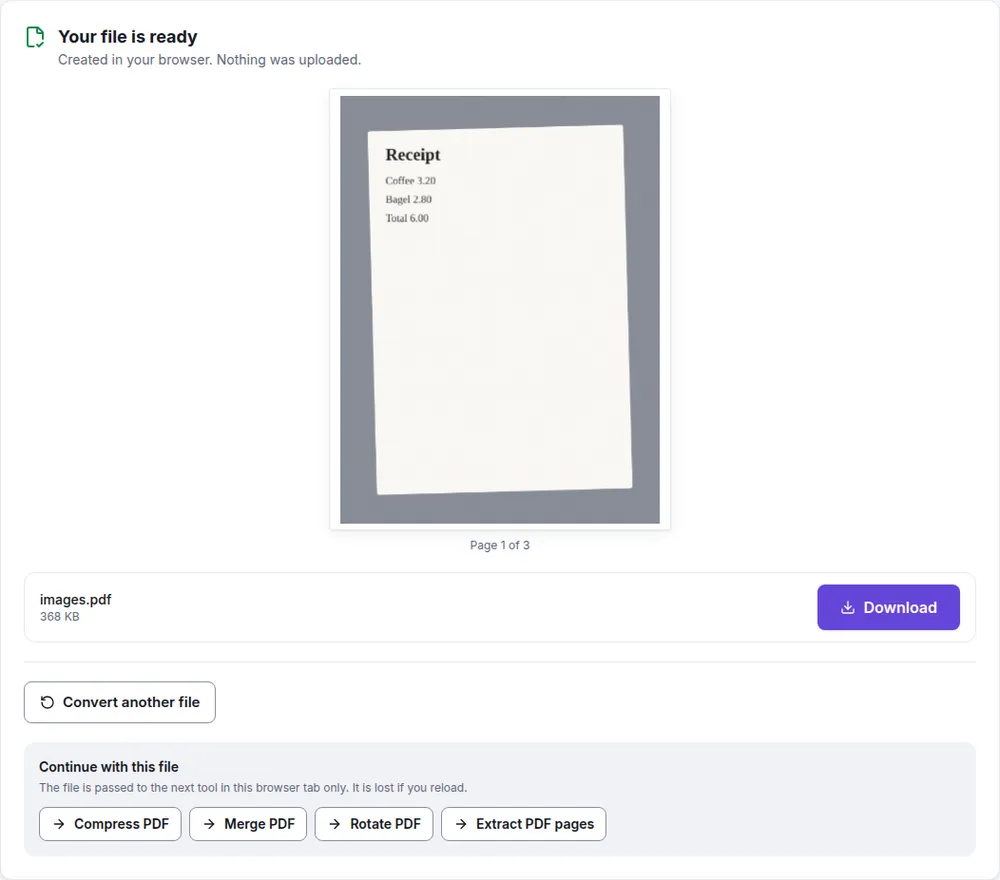
- Select Create PDF, check the preview, then select Download.
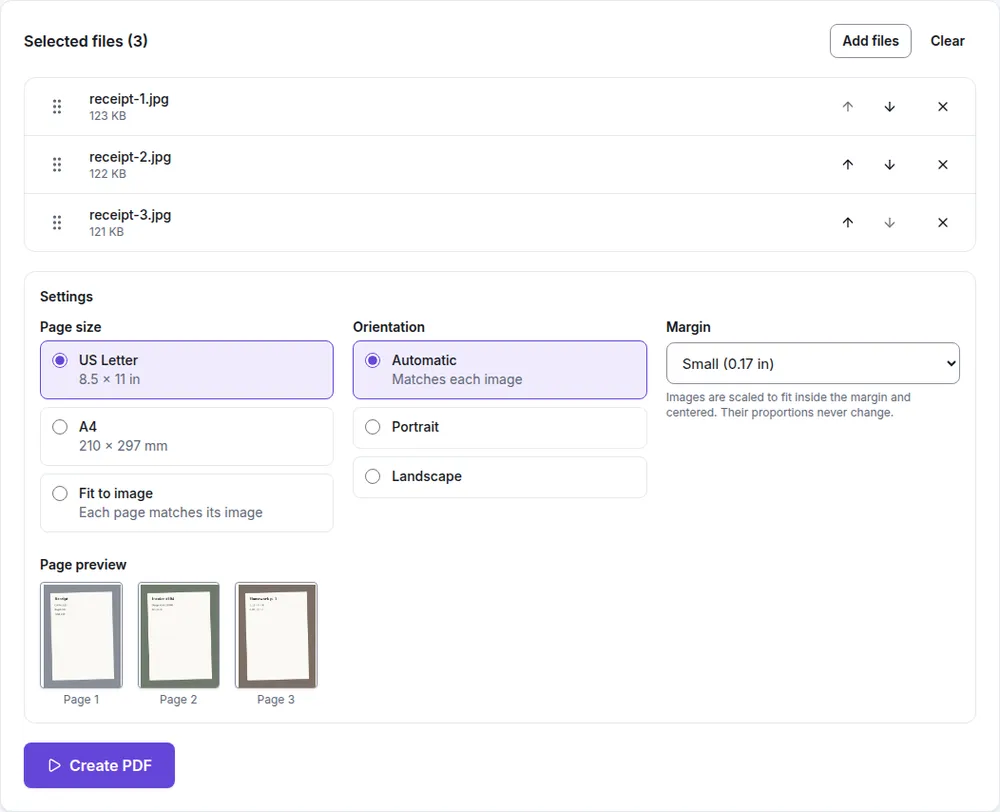
Each photo becomes one page, scaled to fit inside the margin and centered, with its proportions kept. Automatic orientation turns each page to match its photo, so landscape shots get landscape pages. Phones store rotation separately from the photo; Filecon reads it and places each photo upright. JPG photos go into the PDF as they are, without being re-compressed.
iPhone HEIC photos, screenshots and other formats
JPG to PDF accepts JPG files only. If your photos are HEIC (the default format on many iPhones), PNG screenshots or WebP images saved from the web, use Image to PDF instead. It has the same settings and accepts JPG, PNG, WebP and HEIC. HEIC and WebP images are stored as high-quality JPG inside the PDF, because a PDF can't contain those formats directly.
Both tools take up to 50 images at a time, 20 MB each and 100 MB in total.
Common problems
The pages are in the wrong order
Built-in methods usually follow file names or selection order. Rename the files with numbers, or select them one at a time in the order you want. In Filecon, reorder them before you select Create PDF.
A photo is sideways
Some apps ignore the rotation information your phone saves with each photo. Filecon reads it. If a page is still wrong in a finished PDF, fix it with Rotate PDF.
The PDF is too big to email
Full-resolution phone photos make large PDFs. Try Compress PDF on the finished file, or see our guide on reducing a PDF's size for email.
Edges are cut off or there are wide white borders
Print-based methods fit photos to a paper size. Look for a "fit" or "fill" setting in the print dialog, or choose Fit to image in Filecon so each page matches its photo exactly.
For a quick PDF, the built-in options are fine: Files on iPhone, Finder on Mac, and print to PDF on Windows and Android. When you need a set page size, margins or a specific order, or you're mixing HEIC and PNG files, Filecon handles it in the browser without uploading your photos.